Cross-Platform Frameworks in Xcode
Xcode 6 introduced an important, yet under-promoted, feature for developers: the ability to create custom frameworks for iOS and Mac.
If you’ve written any code for either platform, you’ve used frameworks, because everything is a framework. Frameworks aren’t new technology, but now third-party developers can build their own for use across projects and targets, or to distribute to other developers.
Creating frameworks for use in a single target—either iOS or Mac—is as easy as creating a new target and going from there. To create a cross-platform framework—one that can be shared between iOS apps, Mac apps, and extensions on any platform—is a bit more finicky, but the result is worth the effort.
Step 1: Add a framework target
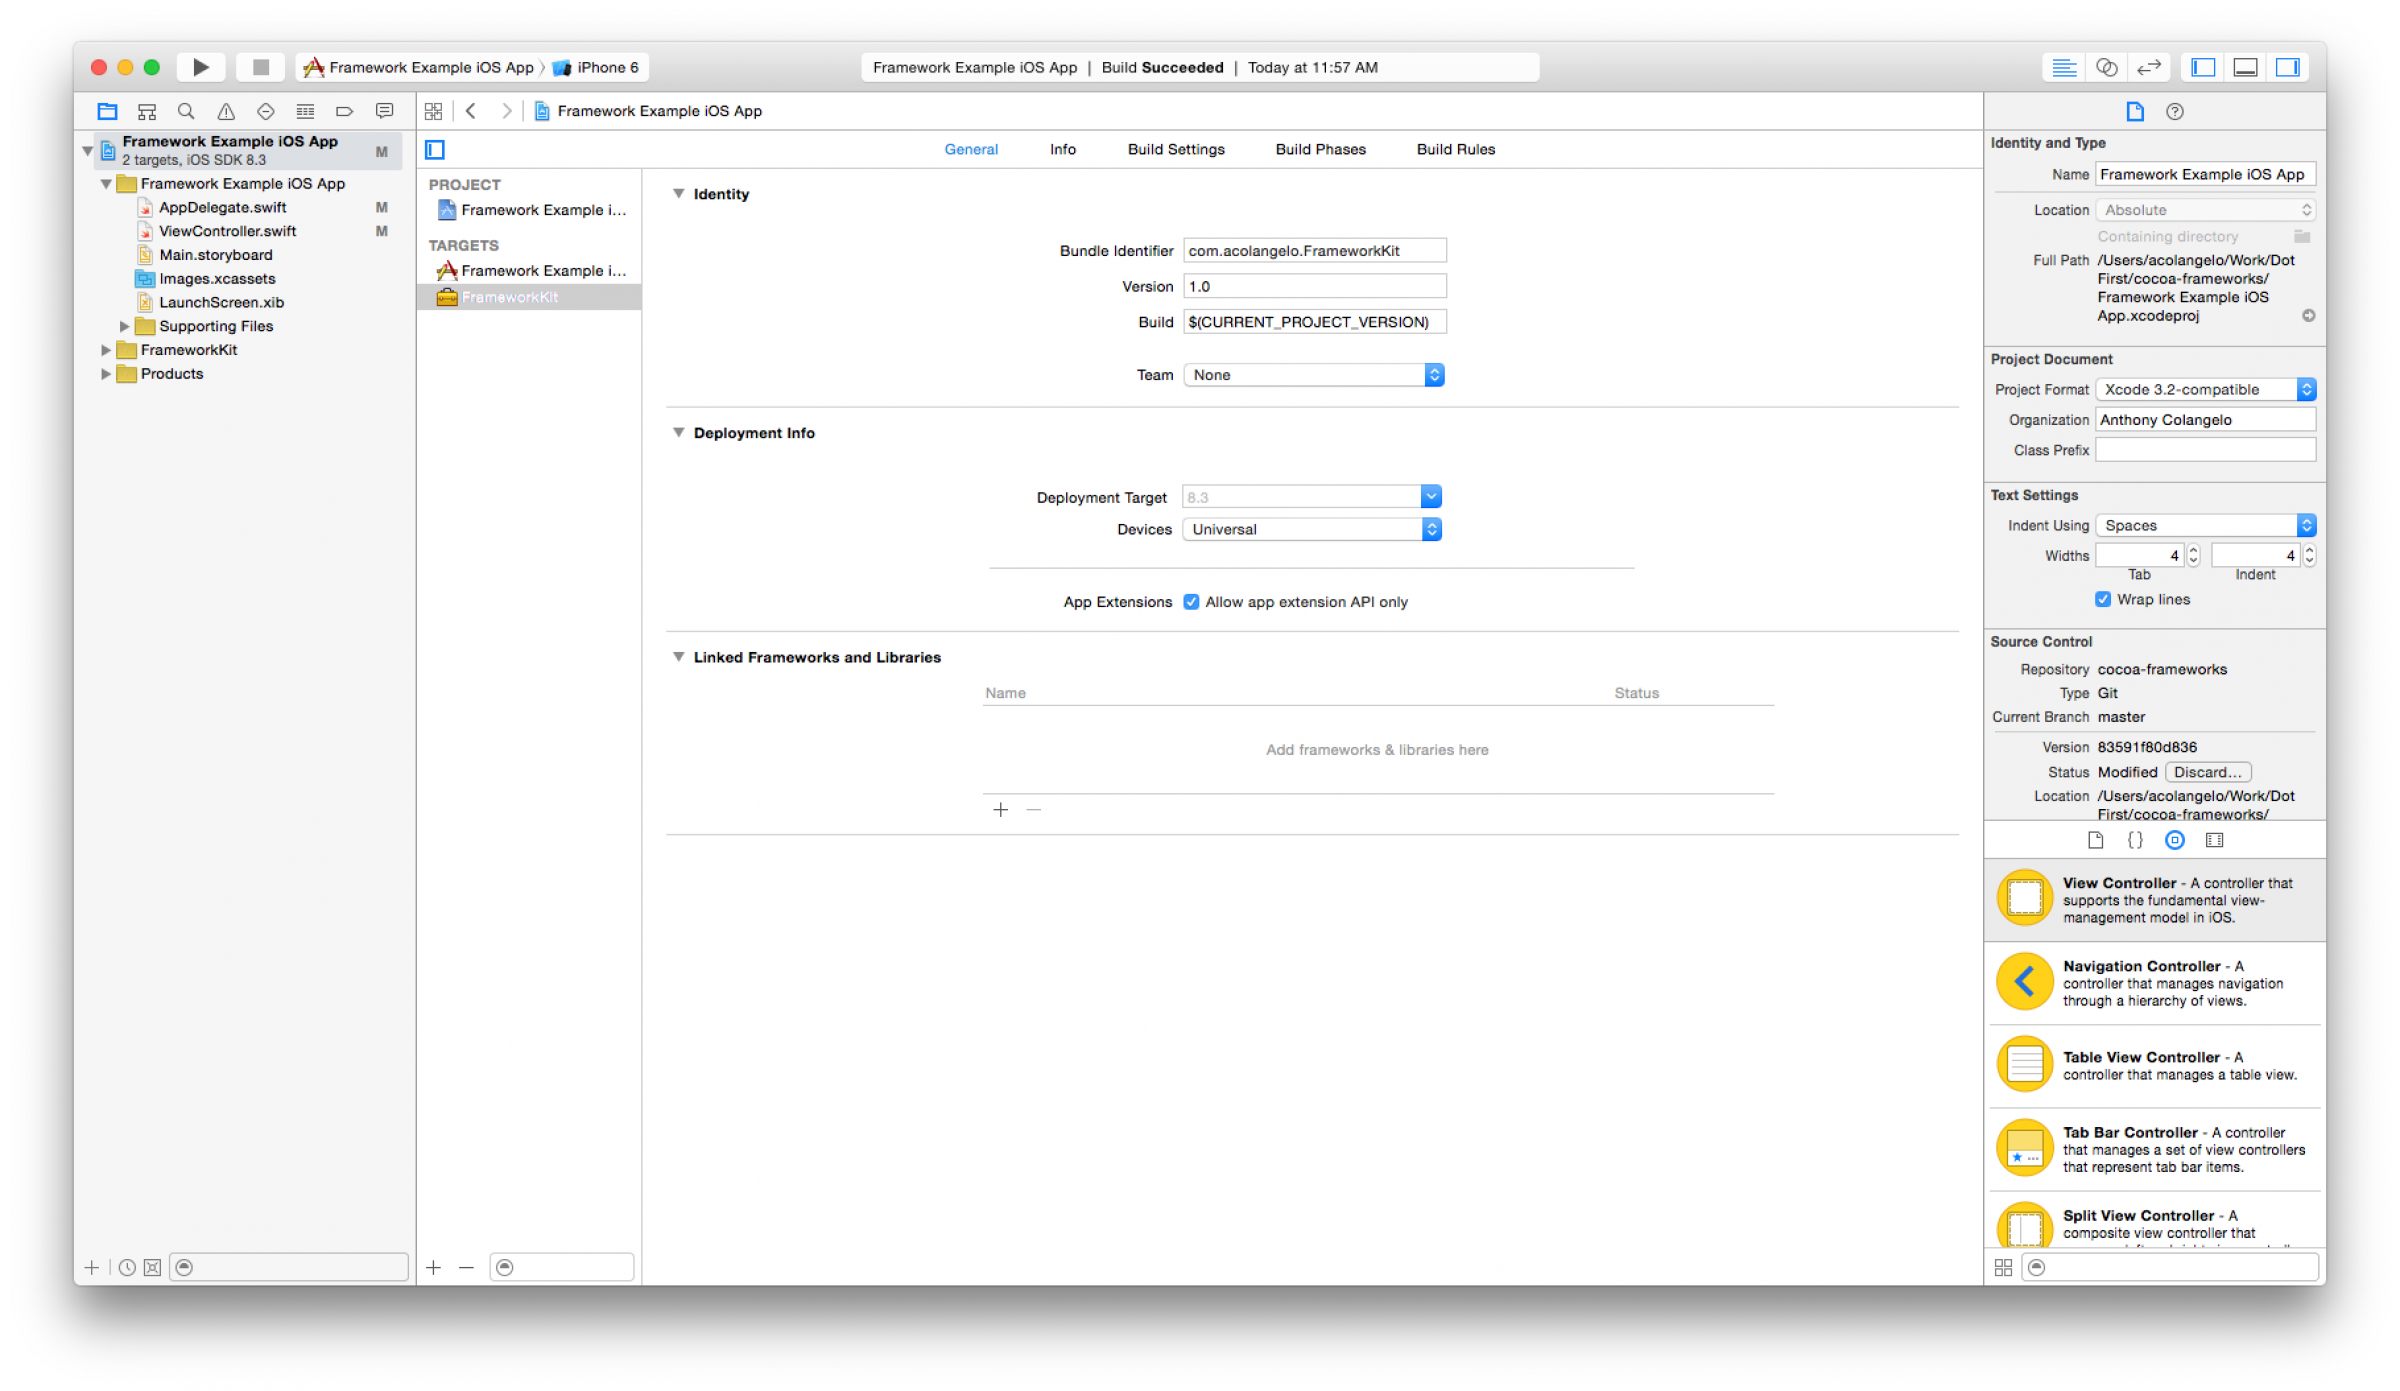
In your Xcode project, create a new target (File > New > Target…). Choose the template for either an iOS framework (iOS > Framework & Library > Cocoa Touch Framework) or an OS X framework (OS X > Framework & Library > Cocoa Framework). I typically choose iOS here, since that’s where most of my projects start.
Click “Next,” and name your framework however you see fit. For this example project, I’m using the name “FrameworkKit,” to stick with the traditional nomenclature.
Step 2: Add a framework target for the other platform
Repeat step 1, but this time, create a framework for whichever platform you didn’t choose the first time. Give this one the same name, but append the platform designation to the end, for clarity. I’m using the name “FrameworkKit Mac” in this example.
Step 3 (optional): Configure frameworks to use app extension API only
If you intend to use this framework in app extensions of any kind, you’ll want to the check the box for “App Extensions” under the “Deployment Info” section of each targets’ “General” tab.
Checking “Allow app extension API only” will enable a compiler-enforced restriction on what you can and cannot put into the framework, which ensures that what you build can be used in extensions. Behind the scenes, this checkbox is flipping the build option titled “Require Only App-Extension-Safe API” in the target’s build settings to “Yes.”
Step 4: Unify Product Names
Head into the build settings of whichever framework was created last. Change the “Product Name” setting (under “Packaging”) to match the first framework’s name exactly.
In my example project, the iOS framework was named “FrameworkKit,” so I updated the Mac framework’s “Product Name” from “FrameworkKit Mac” to “FrameworkKit.”
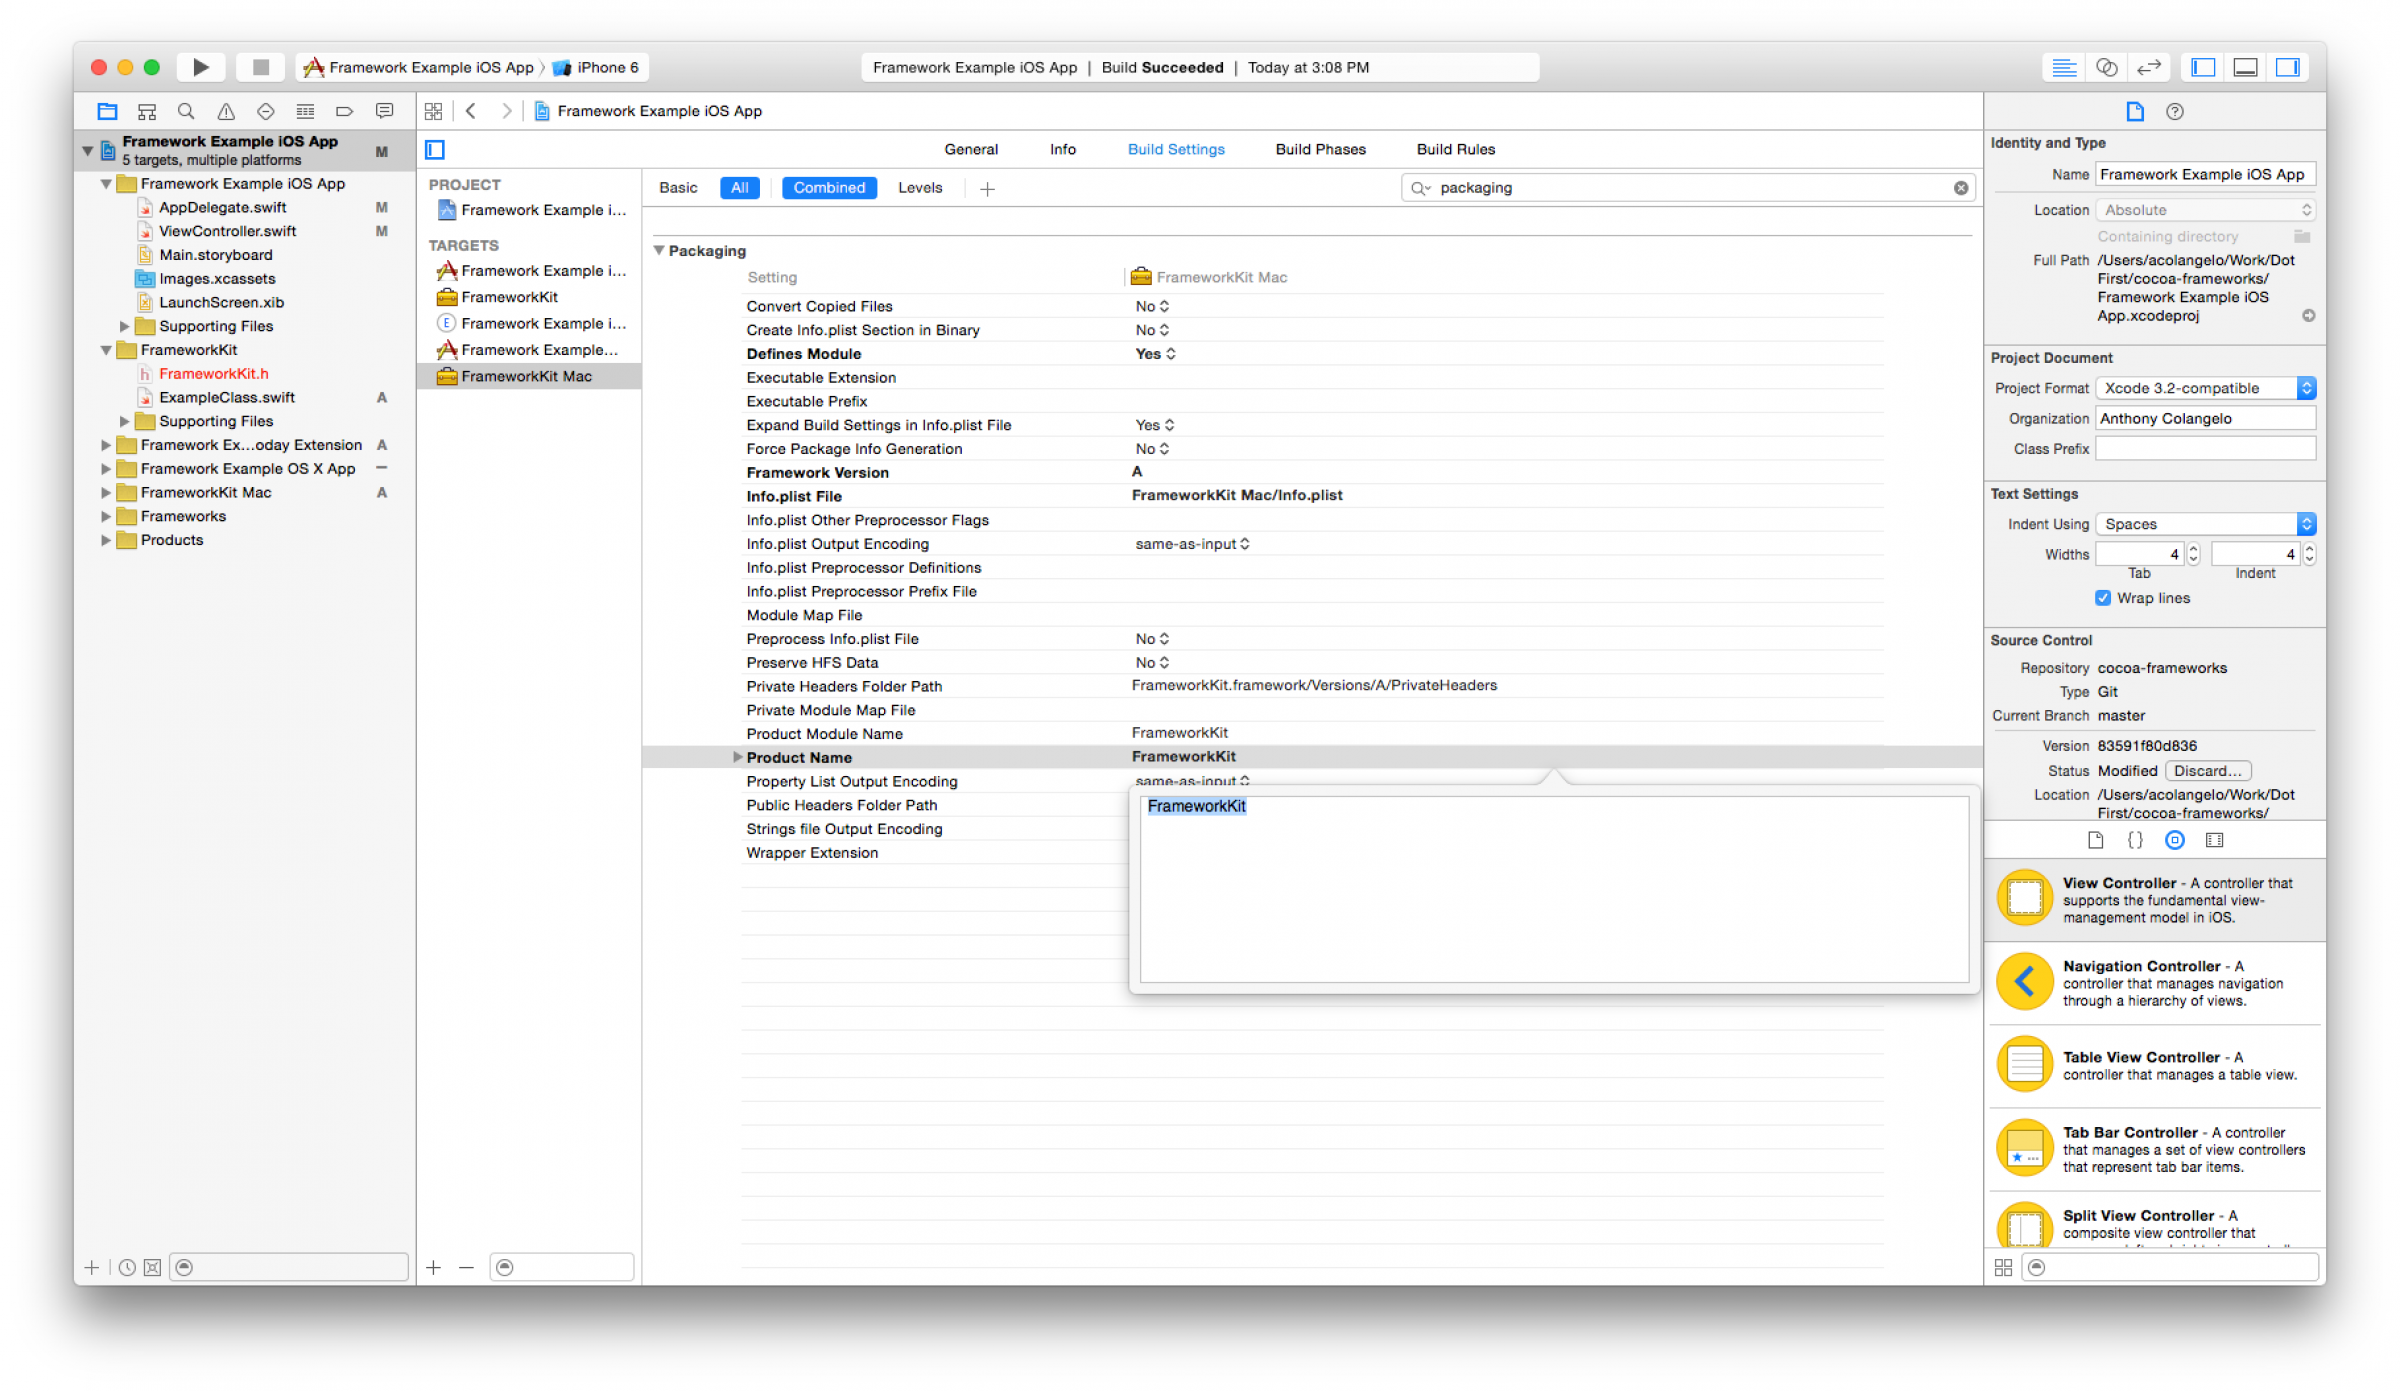
The “Product Name” determines what the framework will be named when built, and with the “Product Module Name,” determines what the import statement will look like when used. We unify them in this step so that no matter which platform we’re using the framework on, the import statements will match.
The import statement for my example framework will look like this in Swift:
import FrameworkKit
In Objective-C, the import statement looks like this:
#import <FrameworkKit/FrameworkKit.h>
Step 5: Embed frameworks in targets
On each targets’ “General” tab, add the platform-appropriate framework as an embedded binary.
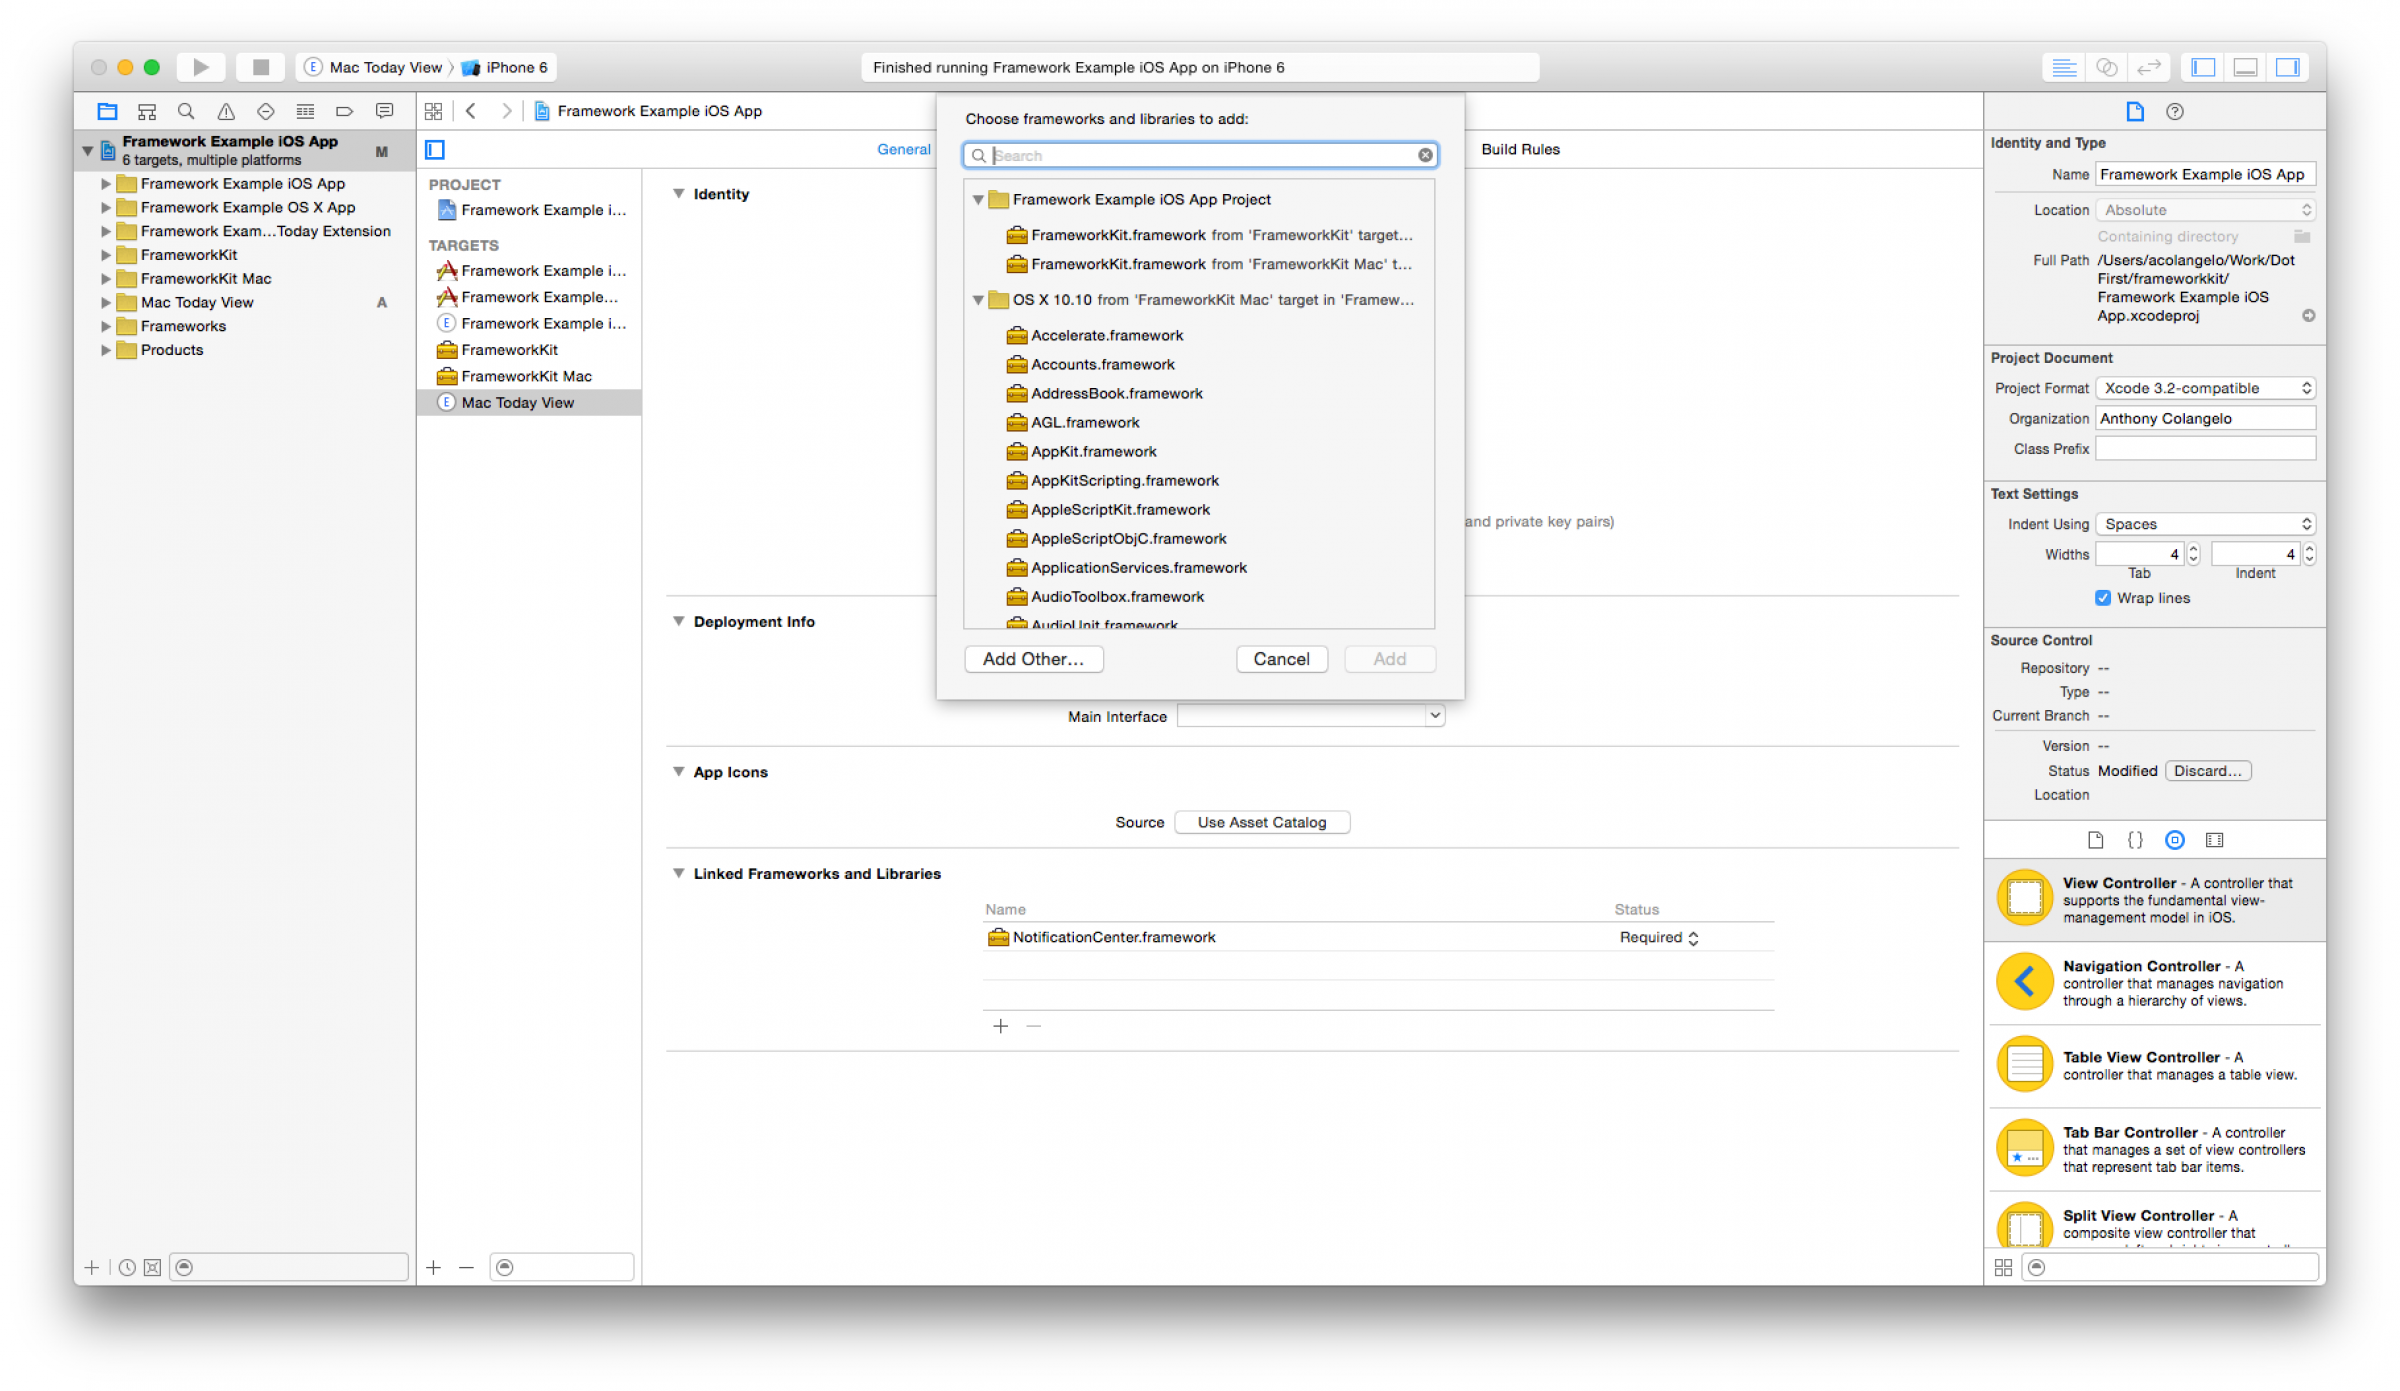
Your custom frameworks should be listed out at the top of the list of options. Since the Product Names are the same, Xcode will give you helpful hints (most of the time…), showing which target each framework is built from, allowing you to choose the correct one.
Step 6: Change import statements to Foundation
Each framework target comes with a header file to start. At the top of these header files, you’ll see an import statement—iOS frameworks import UIKit, Mac frameworks import Cocoa. Since we want to create a cross-platform framework, neither of these imports will do. Switch both headers over to import Foundation.
Change #import <UIKit/UIKit.h> (in the iOS framework) and #import <Cocoa/Cocoa.h> (in the Mac framework) to #import <Foundation/Foundation.h>.
This step does require some upkeep. To keep things building properly, every source file created in the framework from here on out will need to switch to import Foundation instead of UIKit or Cocoa.
Step 7: Write some code!
Now that everything is hooked up and ready to go, start creating the source files of your frameworks. New files should be created in whichever framework target you created first. It’s important to remember to set the Target Membership of every source file to both framework targets.
You can set Target Membership either in the file creation modal window, or in the sidebar when focused on a file (Utilities sidebar > File Inspector tab > Target Membership).
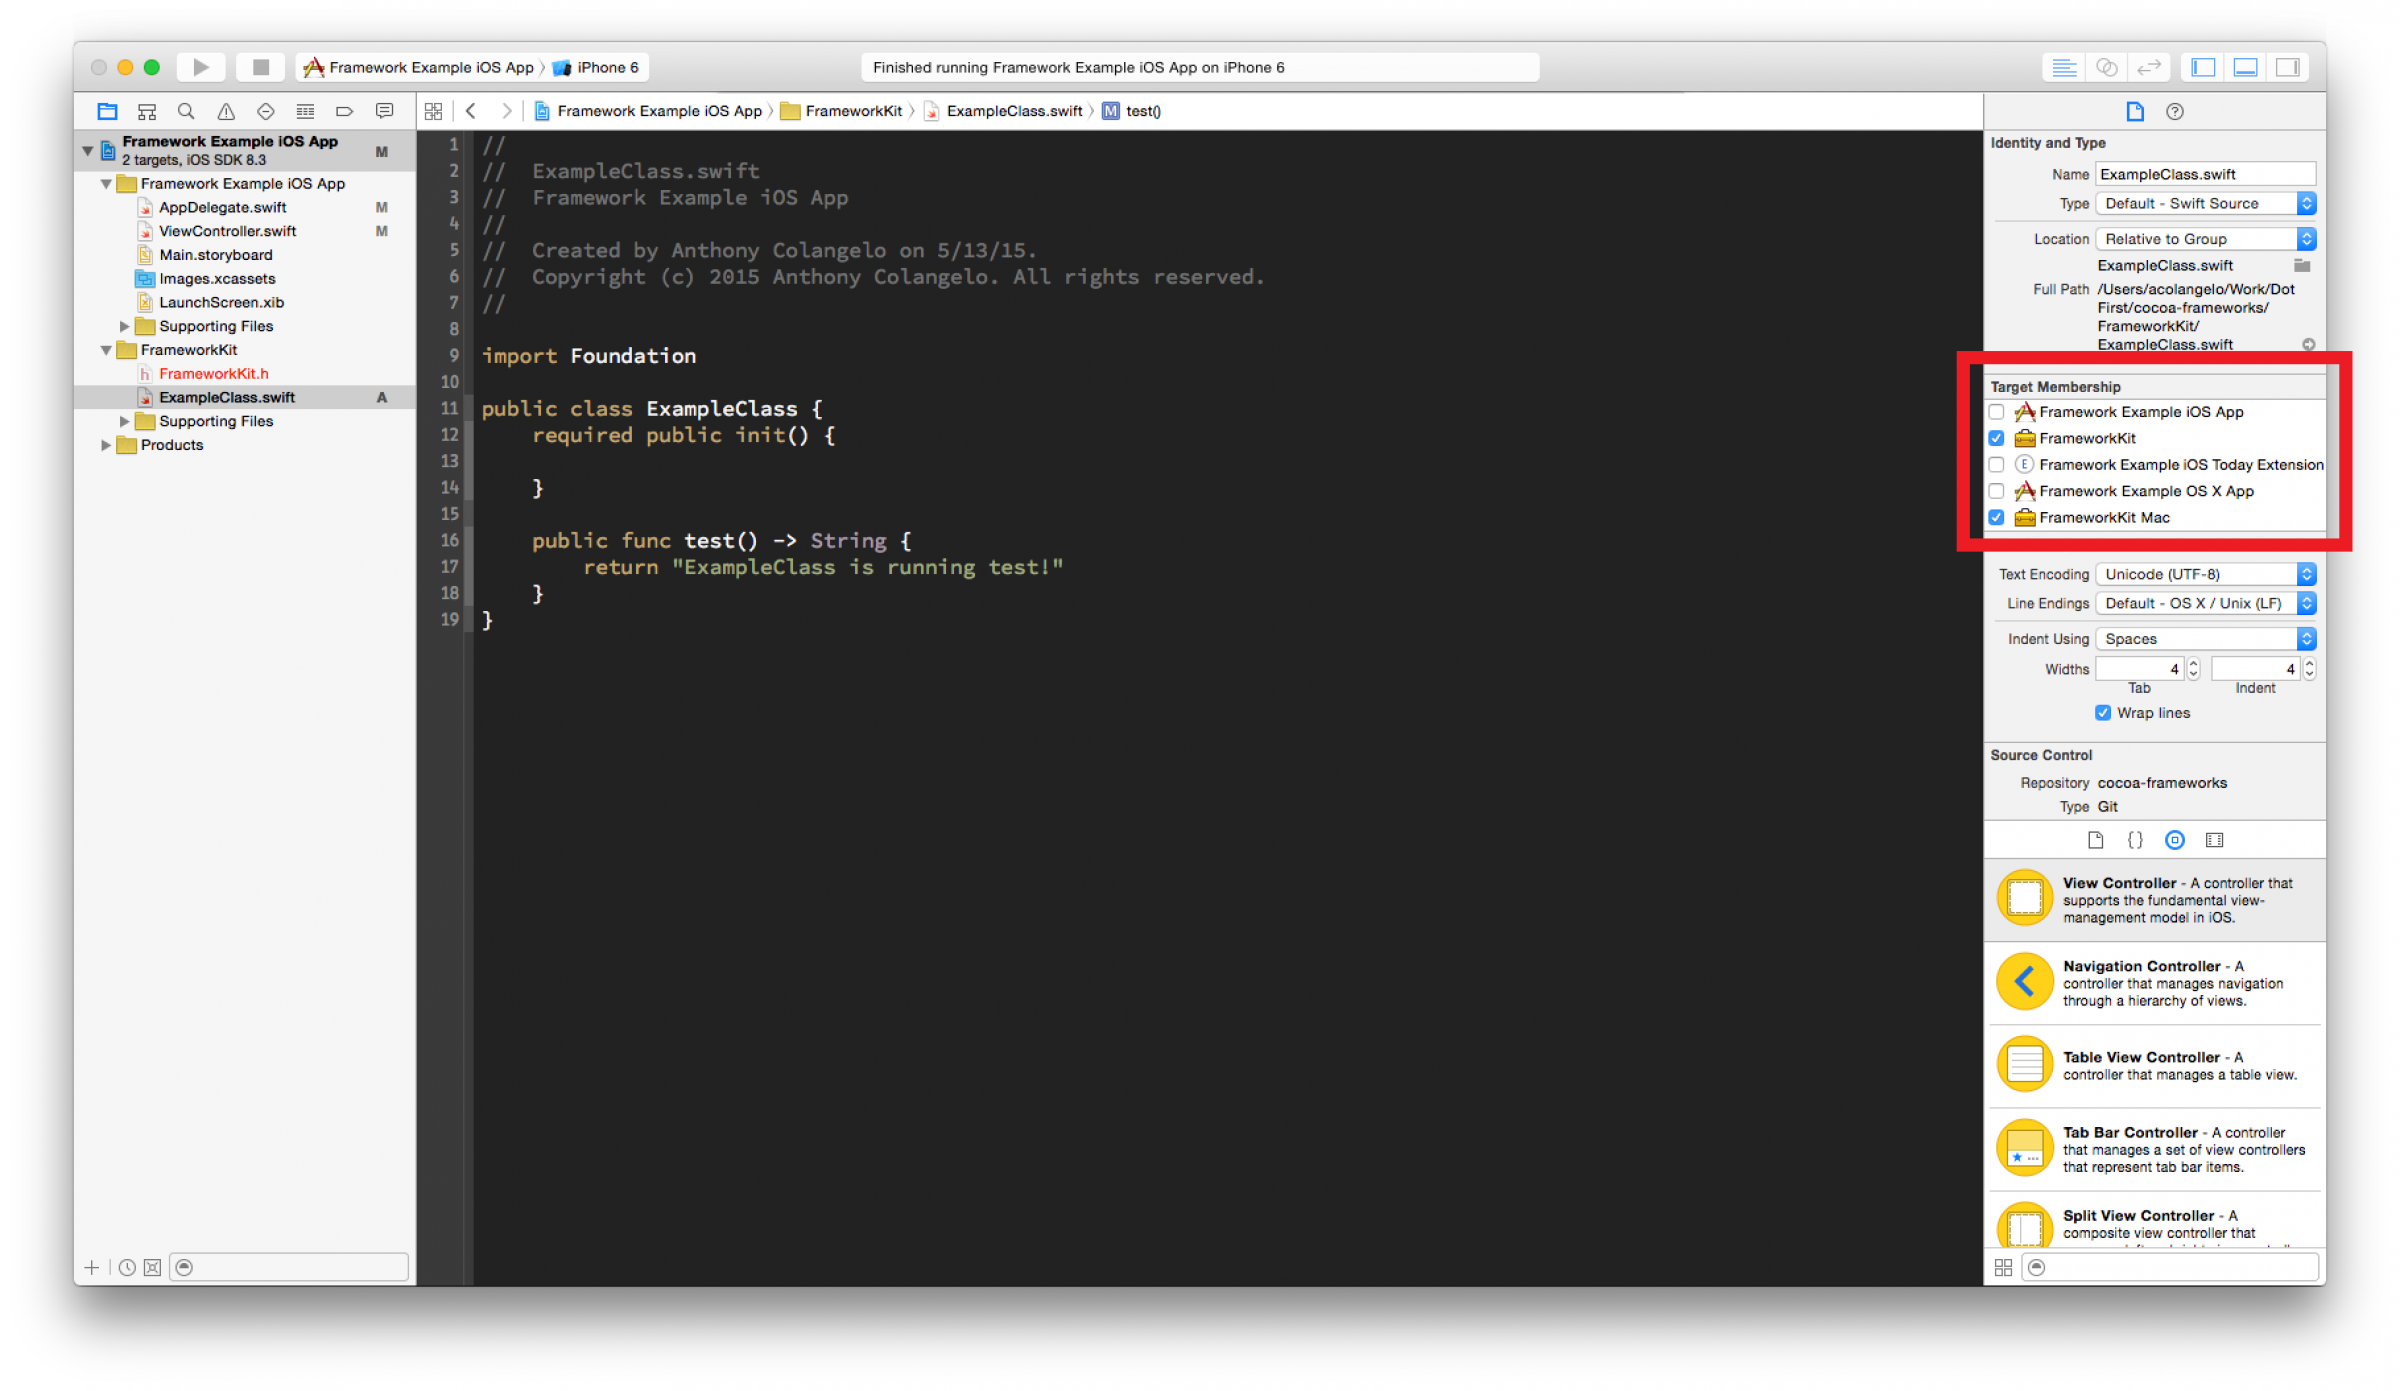
Setting the Target Membership appropriately is the key to ensuring that the same code is used to build out both the Mac and iOS frameworks. And while you’re at it, don’t forget to weed out those UIKit and Cocoa imports in favor of Foundation.
From there, import your framework into your apps and extensions, and get to work!
Resources
I put the example project I built up on GitHub to help illustrate how this all works. Check it out at github.com/acolangelo/frameworkkit.
Apple Developer Library: Creating a Framework
WWDC 2014: Building Modern Frameworks (Search for “Building Modern Frameworks,” because linking is broken and/or non-existent on that page).